Seed potatoes by mail: certified tubers, cutting, planting depth and hilling
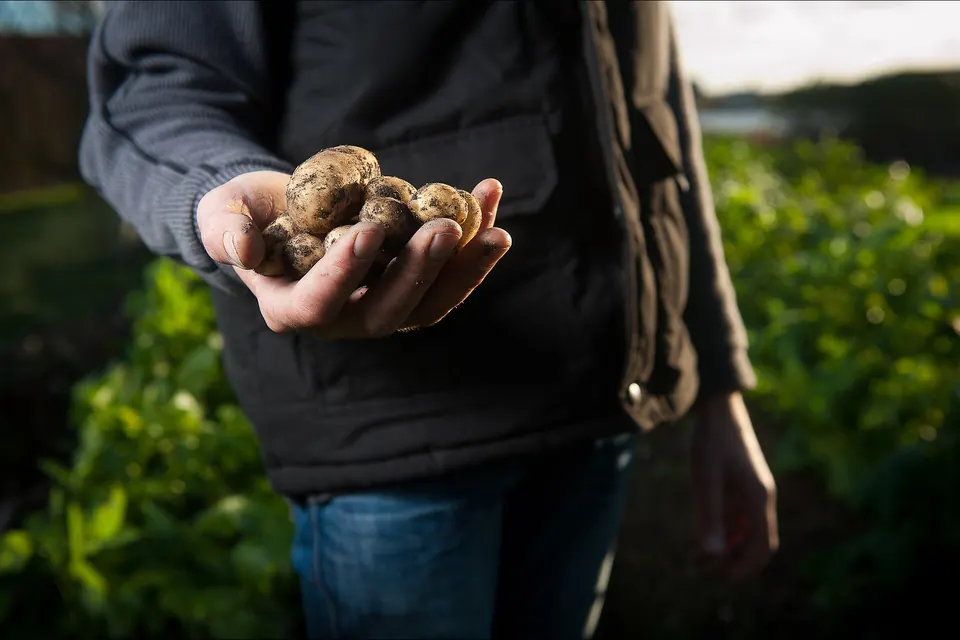
Potato catalogs arrive in winter with pages of red, blue, gold and fingerling varieties you will never see at the supermarket. Seed potatoes are among the easiest things to buy by mail, but they are live tubers, not dry seed, and they arrive with a short list of jobs attached. Here is what to look for when you order, and what to do between the day the box comes and the day you dig the first new potatoes.
What you are actually buying
Potatoes are not grown from true seed in the home garden. You plant a "seed potato": a whole small tuber, or a piece of a larger one, carrying at least one eye. Each eye is a bud that grows into a stem, and the new potatoes form underground on side shoots from those stems. A seed potato is therefore a clone of the variety you ordered, which is why named varieties stay true from year to year.
It also means that whatever diseases the parent tuber carried come along for the ride. That is the main reason to buy from a seed potato grower rather than plant what you already have. University of Minnesota Extension advises buying disease-free seed tubers from a certified grower or seed distributor, and gives two reasons to avoid the alternatives:
- Grocery-store potatoes may have been treated to keep them dormant, so they are slow to sprout, and they can carry diseases that persist in the soil for a long time.
- Potatoes saved from your own garden can carry disease from the previous year. Reintroducing it can harm not only potatoes but tomatoes, peppers and eggplant, which are in the same family.
"Certified" refers to state seed potato certification: the crop is grown under an inspection program designed to keep disease levels low, and the lot has passed it. A catalog that sells certified seed will usually say so plainly, often with the state where the tubers were grown. If a listing is vague about where its potatoes come from, ask before you order.
Choosing varieties from a catalog
Catalog descriptions sort potatoes in two ways: by skin and flesh color, and by texture once cooked. The second matters more in the kitchen.
| Texture | Typical types | Best for |
|---|---|---|
| Mealy or dry | Russets, with brown skins | Baking, frying and mashing; they can fall apart when boiled |
| Waxy or moist | Many red-skinned and fingerling types | Soups, salads and roasting in chunks; they hold their shape |
| All-purpose | Yellow-fleshed types such as 'Yukon Gold' | A balance of the two, for cooks who want one variety |
Beyond texture, look for three things. Maturity: catalogs group potatoes as early, mid-season or late, and early varieties are the safer choice where summers are short. Storage: if you want potatoes to keep through winter, pick a variety described as a good keeper. Disease resistance: if scab or blight has troubled your garden before, choose a variety listed as resistant or tolerant to it; Minnesota Extension notes that a tolerant variety still gets the disease, but more slowly and less severely.
Seed potatoes are sold by weight. How many feet of row a pound plants depends on tuber size, because large tubers are cut into several pieces and small ones are planted whole. If you plan beds from catalogs, our guide to planning a vegetable garden shows how to fit a space-hungry crop like potatoes around everything else.
Ordering and ship dates
Unlike garlic, which you order in summer for fall planting (see our guide to seed garlic by mail), seed potatoes ship in late winter and spring, timed to planting. Popular and unusual varieties can sell out early, so order when catalogs arrive and choose a ship date close to your planting date. Minnesota Extension's advice is to plant as soon as the soil warms, so a box that arrives weeks before that only means weeks of storage indoors. Our page on hardiness zones and shipping seasons explains how nurseries time shipments by region.
When the box arrives
- Open it the same day and check varieties and weights against the packing slip.
- Good seed potatoes are firm. Set aside any that are soft, wet, shriveled or smell of rot, photograph them and contact the seller, as you would for any live plant (our guide to unpacking a mail-order delivery covers claims).
- Short sprouts are normal and a good sign; try not to break them.
- Until planting, keep the tubers in their paper or mesh bags in a cool, dark, airy place where they cannot freeze. A sealed plastic bag traps moisture and invites rot.
Some gardeners set tubers out a few weeks before planting in a bright, cool room to grow short, sturdy green sprouts, a step often called chitting or green-sprouting. It is optional, and the aim is short, stubby shoots rather than long pale ones.
Cutting and curing seed pieces
Minnesota Extension describes small whole tubers, about 1 to 1¼ inches across, as ideal because they need no cutting. Larger tubers are cut before planting:
- Cut into chunks about 1¼ inches across. Every piece needs at least one eye; two or three is better.
- Work clean. Use a clean knife on a clean cutting board.
- Let the cut surfaces dry. Spread the pieces on a tray at room temperature, between 60°F and 70°F, for a few days until each cut face has formed a tough, dry layer. That skin helps the piece resist rot in the soil.
Planting
Potatoes want full sun and well-drained soil; poorly drained ground is more likely to produce diseased tubers. Have your soil tested before the first season. Minnesota Extension gives a somewhat acidic pH of 6 to 6.5 as ideal, and notes that potatoes tolerate soil down to about pH 5. They also need more fertilizer than most vegetables, so follow your soil test and the extension service's side-dressing advice rather than a general vegetable rate.
Plant as soon as the soil has warmed in spring; the date varies a great deal with latitude and elevation, and your local extension office can give you a typical window. Minnesota Extension's spacing:
- cut side down, 3 to 5 inches deep;
- 10 to 12 inches apart in the row, closer for smaller potatoes and farther apart for fewer, larger ones;
- rows 30 to 36 inches apart;
- covered with about 4 inches of soil or compost.
Hilling and watering
New potatoes form near the surface, and any tuber exposed to light turns green. Hilling, drawing soil up around the stems, keeps them covered and gives the plant more buried stem on which to form tubers. Start when the stems are about a foot tall and repeat once or twice during the season, until you have built up 6 to 8 inches of soil in all. Some gardeners plant in a shallow trench and fill it in as the plants grow, which does the same job.
Water matters most early on. Dry spells while tubers are forming can cause knobby or hollow potatoes. Minnesota Extension suggests soaking the soil thoroughly once or twice a week, about an inch of water a week in total, and more often on sandy soil. Keep weeds down with shallow hoeing so you do not cut into the tubers.
Harvest and storage
You can dig new potatoes, tender tubers whose skins have not set, about seven to eight weeks after planting. For storage potatoes, wait until the vines have died back, then dig on a dry day with a spading fork, working from the side of the row so you do not spear the crop. Eat any damaged tubers first; they will not keep.
If the skins still rub off easily, cure the potatoes in a dark, well-ventilated place at about 60°F to 65°F for ten days or more, so the skins set and small wounds heal. Then store them dark, cold and humid: Minnesota Extension gives 32°F to 40°F at high humidity for most uses, and 40°F to 50°F for potatoes meant for frying, to avoid the sweetening that cold causes. Cut away green patches before cooking, discard potatoes that are extensively green, and remove sprouts, which should not be eaten.
Finally, resist the temptation to replant your own harvest next spring. Rotate the bed, and buy certified seed again: it is the simplest way to keep potato diseases out of your garden.
Buy certified, cure the cut pieces, plant when the soil warms, and keep the tubers covered.
Sources
- University of Minnesota Extension, Growing potatoes in home gardens.
 Growing what arrives
Seed garlic by mail
Hardneck or softneck, how much to order, fall planting, mulch, scapes and saving your own cloves.
 Growing what arrives
Planning a vegetable garden
Sun, soil, frost dates and a sowing calendar: turning catalog wishes into a plan.
Ordering & arrivalWhen your plants arrive
Unpack the same day, check, photograph, water, shade, then plant or pot up.